Create Your First Project
Start adding your projects to your portfolio. Click on "Manage Projects" to get started


Insulation
A Halo Infinite 8v8 Multiplayer Map
Table OF Contents
Introduction
Introduction Video:
Below is an introductory video that provides a map fly-through and highlights the map's main features!
Video Summary:
-
Explained what Insulation is, which is an 8v8 Multiplayer Map made for the video game, Halo Infinite, using its level editor, Forge.
-
Provided a brief fly-through, showing off the different parts of the map.
-
Explained which Gamemodes Insulation was made for, those being Capture The Flag (CTF), King of the Hill (KOTH), and Slayer (Team Deathmatch).
-
Highlighted the main features of Insulation, such as the player chutes, piston door, and random teleporters. (See more on next slide)
-
Showcased the power weapons and power equipment placed in the map, like the Energy Swords, Cindershot, Fuel Rod SPNKR, Sniper Rifle, and Overshield pick-up.
Map Features:
Below are some of the main map features of Insulation!
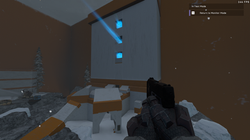
Player Chute:
-
Placed in both team's main bases, the chutes serve as a means to reaching the bottom level of the map.
-
A door opens when it detects a player going through the chute, and closes once the player passes through.


Piston Door:
-
Placed within one of the points of interest, the door allows for players to reach the bottom or skillfully reach the top.
-
The door can be opened via a terminal located on the piston, and closed via a terminal at the bottom floor.
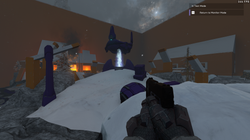
Random Teleporter:
-
Centered in the bottom level, the teleporter is meant to provide players a means of quickly accessing the top level, by randomly shooting them out of two different locations.
-
The teleporter room also provides some weapons players can quickly grab before entering the teleporter.

Power Weapons and
Power Equipment:
Below are the power weapons and power equipment featured in Insulation!
 Energy Sword (Team 1's side) | 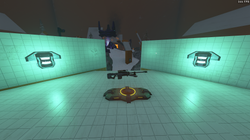 S7 Sniper Rifle | 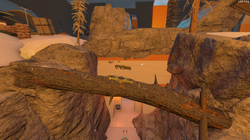 Forerunner Cindershot |
|---|---|---|
 Fuel Rod SPNKr |  Energy Sword (Team 2's Side) |  Overshield Pickup |
Other Weapons USED:
-
MA5K Avenger
-
BR75 Battle Rifle
-
M392 Bandit
-
Hydra
-
CQS48 Bulldog
-
VK78 Commando
-
Pulse Carbine
-
Needler
-
Vestige Carbine
-
Ravager
-
Disruptor
-
Mangle
-
Plasma Pistol
-
Stalker Rifle
-
Shock Rifle
-
sENTINEL BEAM
Other EQUIPMENT USED:
-
Grappleshot
-
Repulsor
-
Drop wall
-
Shroud Screen
-
Thruster
-
Threat Sensor
Design Process
Design Process Pt1 - Preproduction
Below is the first of 3 videos that go over my design process! This video primarily focuses on the first stage of preproduction, which involved research, getting inspiration and documenting a plan!
Video Summary:
-
Started preproduction by getting a better idea of Halo Infinite's multiplayer map design using the map, "Forest".
-
Using the "Forest" map, I took pictures of the space and drew an analysis of the pathing used within the map to better understand how multiplayer mapping works.
-
Documented a rough idea of what I wanted to do for the map using a "Level Planner" I was provided when attending DigiPen.
-
Illustrated a (very) rough overhead sketch of the map that I used as a framework when blocking out the space.
-
Finalized preproduction stage by playing Halo 2 missions "Sacred Icon" and "Quarantine Zone" and taking pictures to get inspiration from the environment.
Preproduction -
Documents and Inspiration
Below are the documents I used to plan an idea for the level as well as some of the inspiration I used when conceptualizing the environment of Insulation!
Level Planner
Document

"fOREST" aNALYSIS SKETCH

"Sacred icon" and "quarantine zone"
Inspiration Pictures


Design Process Pt2 -
Blockout and cover
Below is the second of 3 videos that go over my design process! This video primarily focuses on the main meat of working within the level editor, which was blocking out the basic layout of the map and then adding cover to the spaces!
Video Summary:
-
Highlighted an early stage of my blockout and what I had done like using the sketch as a framework for the landscaping, setting up simple blockouts of the player bases, and making a roughly functional script of the player chute feature.
-
Moved on to a later stage of blockout which showcased how I had made a new sketch as a framework for blocking out the lower level of the map and also how I had begun adding points of interest (POI) like the forerunner structure POI and the landscape of the sentinel factory POI.
-
Shifted a bit farther into development where I had begun adding cover to the lower level area using in-game assets to make it more believable and also had begun adding cover to some of the top level areas as well.
-
After that, I then showcased a later stage when I had added all the cover to the top level area and had fully blocked out the POIs on both sides of the map.
Stages of development -
eARLY Blockout AND COVER
Below are the first two stages of developing the level and some main highlights of what specifically was added during these stages!
1ST Stage -
eARLY bLOCKOUT
 |  |  |
|---|---|---|
 |  |  |
The first stage primarily involved making the basic framework of the map like the landscape and base layout, as well as the basic layout for the bottom level and the POIs that connect to that level.
2nd Stage -
eARLY Cover Placement
 |  |  |
|---|---|---|
 |  |  |
The second stage mainly involved adding cover to the bottom level using in-game assets to make the space more believable as well as making the cover feel less arcade-y. Beyond that, I also added some additional cover to the top level as well as a POI for one the sides of the team bases.
Stages of development -
Finishing and polishing
Below are the last two stages of developing the level and some main highlights of what specifically was added during these stages!
3rd Stage -
Finishing Cover and Poi placements
 |  |  |
|---|---|---|
 |  |  |
The third stage primarily consisted of adding the rest of the cover to the top level (still using in-game assets to make it the environment believable) as well as adding the "sentinel factory" POI for more cover and for objective gamemodes.
4th Stage -
Polishing the environment
 |  |  |
|---|---|---|
 |  |  |
The last stage mainly involved adding additional polish to the overall level, like adding more in-game assets for believability, adding lighting for location distinction, and adding VFX for atmosphere purposes and more believability to locations.
Design Process Pt3 -
Weapons and Gameplay
Below is the final video that goes over my design process! This video primarily focuses on the remaining stages I had to complete once the map was set up, which was adding weapons/equipment, and then adding the gameplay nodes for the gamemodes I wanted to test!
Video Summary:
-
Explained how before I started placing weapons, I used an 8v8 map as a reference for how many weapons (on average) should be placed within my level.
-
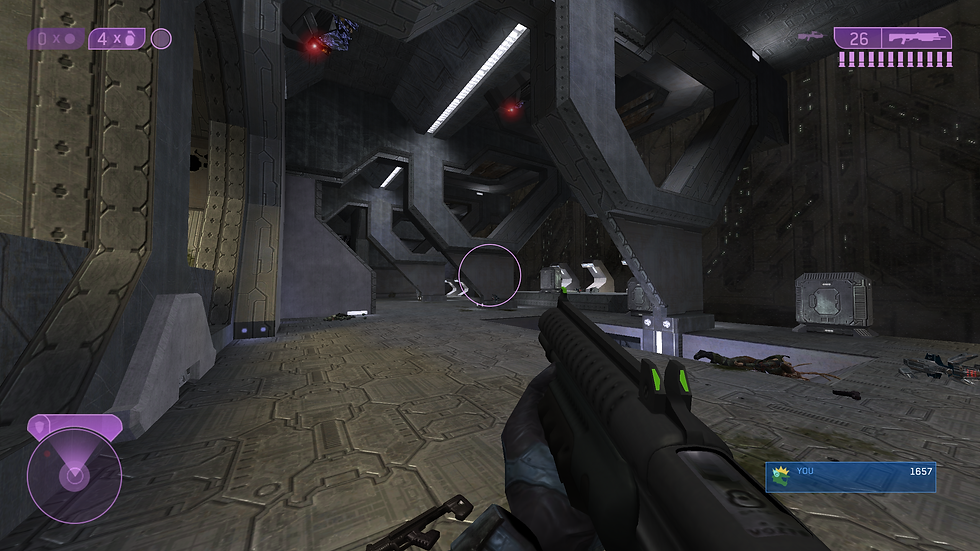
Briefly flew-through the map to show where most of the weapons and equipment were placed in the level.
-
Described how I made sure that weapons complimented the space like giving one side a better weapon to counter the other side who has more cover to fight behind.
-
Also demonstrated how I placed equipment to compliment the space by placing a Grappleshot next to the opening at the bottom level so players can reach the top via the equipment.
-
Showcased where I placed gameplay nodes such as CTF and KOTH.
-
Highlighted the process of placing spawn and respawn points and some of the settings I had to tweak to make sure they worked fair.
Playtesting and
Feedback
Playtesting Video:
Below is a video that highlights my process of conducting playtests and the steps I had to take!
�
Video Summary:
-
Explained that my first step of conducting the playtest was to gather enough people to playtest for me, and how I attempted to do so by asking friends as well as sending out an RSVP to my local "Halo Club" at DigiPen.
-
Elaborated on the restricting systems Halo Infinite has like the maximum number of bots being 8, meaning I needed at least 6-8 people in order to test an 8v8 map.
-
Recalled my first attempts of attempting to test the level, and how the first time was a failure due to not having enough people, but the second attempt yielding enough people to test.
-
Showcased the survey I used and the questions I asked the testers after playing Insulation.
Playtesting -
rsvp/survey documents
Below are the documents I used for playtesting Insulation!
RSVP
Document

playtest Document
Survey Collaborator

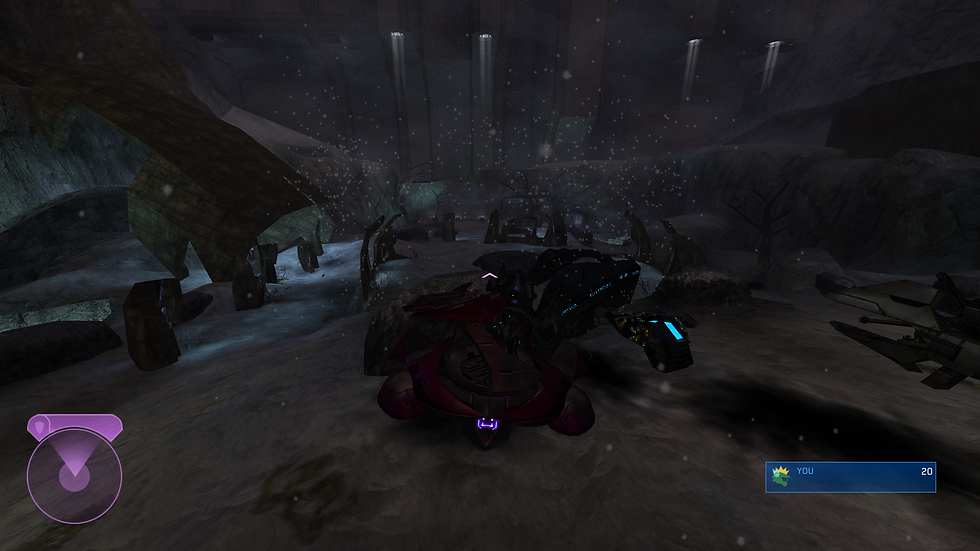
Playtest gameplay recording
(Note: It's unedited and also my friends (testers) can be heard so it's a bit of an unhinged playtest session. You have been warned :D)
Feedback Video:
Below is a video where I look over some of the feedback I received from designer consultants as well as the playtesters who took my survey!
Video Summary:
-
Started by talking about the feedback I received early on from a DigiPen Level Designer alumni, Isaac, about how to set up cover within the space as well as testing the time of map mobility and discovering it was too fast.
-
Also mentioned how I got feedback from another DigiPen alumni, Jordon, about the cover I had set up and some changes that could be made along with some feedback on my player spawners.
-
Highlighted the feedback I received from the playtest survey and how despite having 13 - 16 testers total, I only received 7 answers for the survey.
-
Briefly mentioned some of the specific feedback I received from the survey and the changes I made within the level to accommodate for that feedback.
Challenges and
Reflection
Challenges/Reflection Video:
Below is an introductory video that provides a map fly-through and highlights the map's main features!
Video Summary:
-
Began by explaining that my first challenge on working on the project was commitment to it since I had a large time gap between starting and finishing it.
-
Added to that by explaining that I originally planned Insulation to be a 4v4 map, but realized through feedback that I was making an 8v8 map, and pursued that.
-
Highlighted the challenges I had using the Forge editor, such as setting up the player chute system, as well as making a the piston door mechanic.
-
Recalled one of the challenges of gathering enough playtesters to try out the map and how difficult it was to get less than 8 people on the same time.
-
Briefly go over some of the reflections I gathered from making Insulation such as the amount of time and consideration that goes into multiplayer map design, the importance of making all sides of a map feel fair, and discovering ways to make a Halo Infinite map feel fun for Halo fans.
Challenges -
What I faced and how I dealt with them
Below are some of the main challenges I faced and how I found solutions to fix them or make them less of a problem!
Time Commitment to project:
-
One of the biggest challenges I faced was committing enough time to the project since I started the project back in Fall 2024, but didn't get most of the work done till Summer 2025 which was due to time management but also motivation to see the whole project through.
-
What helped allow me to get back to the project was the fact that it was the summer so I had less responsibilities to take care of, but also because I felt generally more confident of a Level Designer after my junior year at DigiPen.
-
Learning forge's tools/scripting:
-
Another large challenge was understanding how to use Halo Infinite's tools like the gravity slides for the player chute system, and learning how to do scripting for the piston door system.
-
The best solution I found was to brute-force method my way through setting up specific systems like the piston door, and then through testing and errors, did I discover new solutions to previous issues like the messy script I had before using custom events or using gravity slides as brakes for the chute.
-
Challenges of playtesting:
-
The final challenge I faced was getting enough people to playtest with me, as I only ended up with 6 - 7 testers after a failed attempt beforehand because we only had 5 testers.
-
The only solution I found to this challenge was being persistent about getting a playtest completed, so after the first failed attempt, I rescheduled to a day that seemed to work better with testers and continued to message around to get as many people as I could for the playtest.
-
Reflection -
What I learned
Below are some of the general lessons I learned from developing Insulation!
The complexion of
Multiplayer map design:
-
While I had previously made a multiplayer map in UEFN for a project, this was the first time I really had to understand the game to make the map feel fun. Thankfully, Halo Infinite was a game I commonly played so understanding the flow of Halo Infinite's gameplay and map design came intuitively.
-
Despite the experience of being a Halo fan, it was still very tough to consider all the aspects of multiplayer map design like map pathing, sightlines, weapon placements, player spawning, and many more!
-
By doing this project, do I feel much more confident making multiplayer-related content going forward, as well as providing insight to those who have less experience on the subject.
balancing FAIRNESS WITHIN
EACH AREA OF A MULTIPLAYER LEVEL:
-
Another big aspect when making Insulation was trying to make sure that when I added in parts of the level, that they were balanced in a way that made them fair for either teams. This involved making design choices like adding better weapons on a side with less cover to counter the other side that had a lot more cover, but had weapons that we more close-range, in case the other side attempted to infiltrate the area.
-
Another way I did this was how I designed one of the POIs and made it to where one side had more of an advantage to getting inside the structure, but the other side gets higher ground upon entry from their side of the map.
-
Weapon placements were very calculated when placing them in the map. I attempted to make sure no repeats were in the same location, but also that the weapon or equipment complemented the space it was in.
gALLERY


